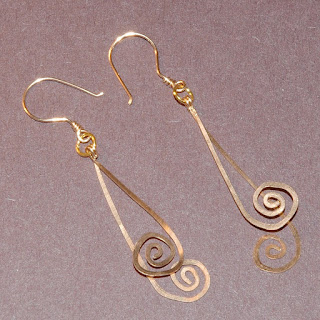
Lovely! I can't wait to wear this to the Farmers' Market this weekend!


 I thought I'd show you a bit of a work in progress. I was asked to do a custom bib-style necklace that I had to order some shell beads for, but while I'm waiting for those to arrive, I was inspired by that order to create something a little bit similar, but very different. Above is my little tray that I use quite a bit now - my husband has stolen my good desk chair from my office and is using it for his second desk (yeah, he has two "offices" in our house, don't get me started, lol). So I am stuck beading and making most of my jewelry here on my living room couch. Not that I totally mind - I can watch movies while tweeting to you all or making jewelry, so it isn't too bad.
 Here are some of the tools I'm using for this necklace. It will be a bib-style, and in the bib part will start off with a chain mail type chain (a very simple chain mail weave though). To do this, I need my bent chain nose pliers - both pairs! I also need my jump ring opening ring - the little round silver thing in between two pairs of pliers. This little ring is a Godsend for chain mailers everywhere! Pop it on your finger with the correct-sized slot facing out to fit your jump rings and voila! your rings open SO quickly! I also have round nose pliers and my cutters for adding the beads after the chain part is done. In addition, I have some files just in case I need to smooth edges.
 Here are my beads! Well, some of them I have also already added some onyx and lapis lazuli chips to the chain for dimension. Above are chips of amethyst, citrine and cherry quartz (which, incidentally, cherry quartz is NOT a gemstone, it is color-impregnated glass. Very pretty and colorfast, but NOT a gemstone!). I also have my headpins. When I start my metals mithing course next month, one of the things I absolutely HAVE to learn is to make my own headpins so that I never, ever, ever run out of these little buggers ever again!
 Here is where you can see the stages of the necklace in progress, though I am deliberately keeping you fuzzy (pun intended) on the final necklace's details. Gotta leave something to your imaginations, right?? At the top of the photo above you can see the individual rings which I link one by one to create the simple double linked chain you see in the middle of the above photo. At the bottom you can (hazily) see the chain now has all sorts of bead chips added to it - what fun!! By the end, you'll have a hard time seeing the silver of the rings - it will be almost covered with gemstone chips, so pretty :)


 Here is another new bracelet with rainbow fluorite beads dangling from a sterling silver chain. Rainbow fluorite is hard to find in good quality, so it is expensive to use, but the results speak for themselves - gorgeous jewelry that no-one else will have!
 I created a custom hook and "S" clasp from sterling silver wire, and then hammered it for strength and durability.
 The drape on this piece is really fantastic - it isn't very heavy, but flows nicely on your wrist, as you can see here. This is now available on my Etsy Shop: http://www.etsy.com/listing/51503481/flora-sterling-silver-and-rainbow
 Boudicca Sterling Silver Hearts Bracelet with Amethyst, available in my Etsy Store: http://www.etsy.com/listing/51423235/boudicca-sterling-silver-hearts-bracelet

 ~NeoAmour Elizabeth Nest Ring~
 ~Custom Sterling Silver Nest Ring with Rainbow Fluorite~
and Arwen
~Custom Sterling Silver Nest Ring with Rainbow Fluorite~
and Arwen
 Sweet Saturday indeed! Here are some new rings I've been working on lately: the first is a ring that is sweet, yet sort of Steam Punk. I used sterling silver wire to make a comfortable shank, adding a teal Swarovski crystal to the center. I then coiled more sterling silver wire around the base wire and added 2 clear Swarovski crystals to the outside of the teal bead, coiling the remainder of the wire on the sides.
 The result is a coiled ring that is pretty, yet different. You could keep it shiny, or allow it to patina and darken naturally, giving it a worn look for a more "Steam Punk" style.
 The second ring I am calling my Turquoise Saturn ring. I took a real turquoise bead and surrounded it with a nest of sterling silver wire and creating a comfortable shank in the process.
 It looks like a planet surrounded by rings (or a Robin's egg in a nest, whichever suits your fancy). I will be listing these rings on my Etsy store this weekend, so please do stop by and have a gander... I have even more cool items to come, please keep checking back!